
Window replacement is a project many homeowners find daunting. It’s important to get the measurements right in order to ensure a proper fit and cost estimation for your windows.
This article provides an easy-to-understand step-by-step guide on how to measure your current window correctly, so you can be sure that when you order your replacement windows they will fit like a glove!
Learn all the tips and tricks of measuring for new or old windows, including different types such as sliding, double hung and bay/bow windows.
Get familiar with window sizing terminology such as sill, jambs and header–and even DIY vs professional measurements! Start off on the right foot by learning about accurate window measurements: Our article will help make this process easier than ever before!
Why It’s Important to Properly Measure Your Windows
Knowing the exact dimensions of your windows ensures that you can purchase a replacement window with the correct fit, while providing more precision when estimating costs.
Ensures correct fit for replacement windows
Having the right size window is essential for ensuring a proper and energy-efficient fit when replacing existing windows. Accurate measurements are needed to select the appropriate replacement window that will both look graceful and function electrically as well.
Measuring from the inside of your existing window frame provides you with the most accurate dimensions for ordering your new windows, ensuring there won’t be any gaps that can cause drafts or inefficient insulation, leading to increased energy costs in cold seasons.
Additionally, adequately accounting for wall thickness plays an important factor in selecting the right size of replacement windows since it affects the overall dimension of your window opening; otherwise, air leakage or installation difficulties may occur.
Helps with cost estimation
When replacing the windows of a home, cost estimation is essential to ensure that the project goes as smoothly and inexpensively as possible. Taking accurate measurements beforehand can help to avoid costly mistakes such as ordering too small or large of window frames and incurring additional expenses for modifications or repairs.
Before replacing your windows, accurately measure each opening including width, height, depth and jamb thickness. Be sure to carefully check that all components are level and square so you do not need to make adjustments later on.
Additionally, consider factors like frame material which could affect costs when determining an estimate for window replacement – vinyl and aluminum tend to be more affordable than wood or fiberglass frames while also being less maintenance in terms of upkeep over time.
Parts of Window You Should Be Familiar With
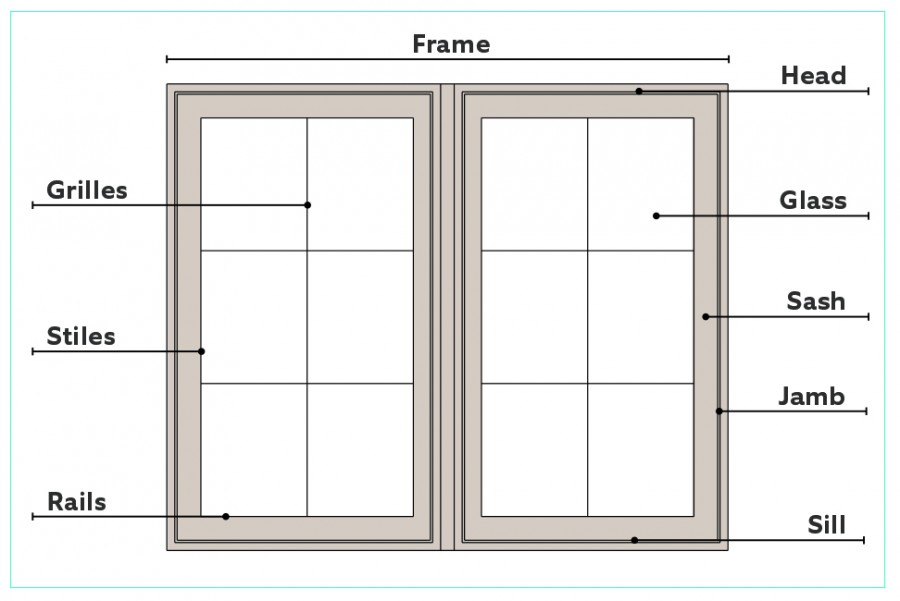
It is important to familiarize yourself with individual window components such as the sill, jambs, and header before beginning the measuring process.
Sill, Jambs, and Header
The sill, jambs, and header are essential parts of a window frame that make up the opening. The sill is located at the bottom of the frame and runs horizontally across it. This part of the window helps to keep water from pooling around and underneath the window area.
Jambs are vertical along both sides that run between the sill and header creating an enclosed space within which a window sits or slides open/closed. The header supports the weight of windows above as they open/close in place.
When measuring for replacement windows, these components must be accurately measured for proper installation of new ones – this ensures correct fitment and can help with cost estimation too!
Check for square and level
It is essential that you check for square and level before measuring your windows for replacement. A window that is not square or level can lead to installation issues, as well as problems with the overall performance of the replacement window.
This includes air leakage, water infiltration, and difficulty operating the window due to an imbalanced frame. When measuring a window opening, it’s important to start by assessing if its corners are perfectly straight in order to ensure correct fit for the replacement windows.
You should also take measurements from outer corners of the window opening instead of inner ones so you have accurate measurements when ordering new products. By checking if a frame is square and level prior to taking dimensions this helps ensure accurate estimates on cost and ensures proper fitting replacement windows every time!
Step-by-Step Guide to Measuring Your Windows
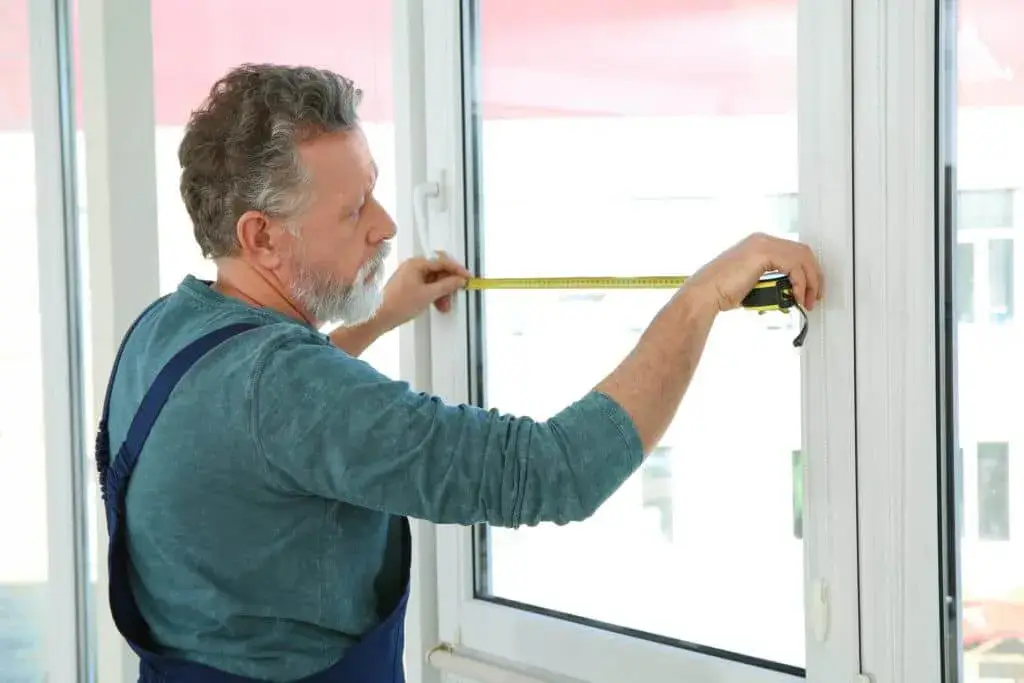
To get the most accurate measurements, use a steel measuring tape and measure the window’s width, height, and depth from both inside and outside faces of the trim molding.
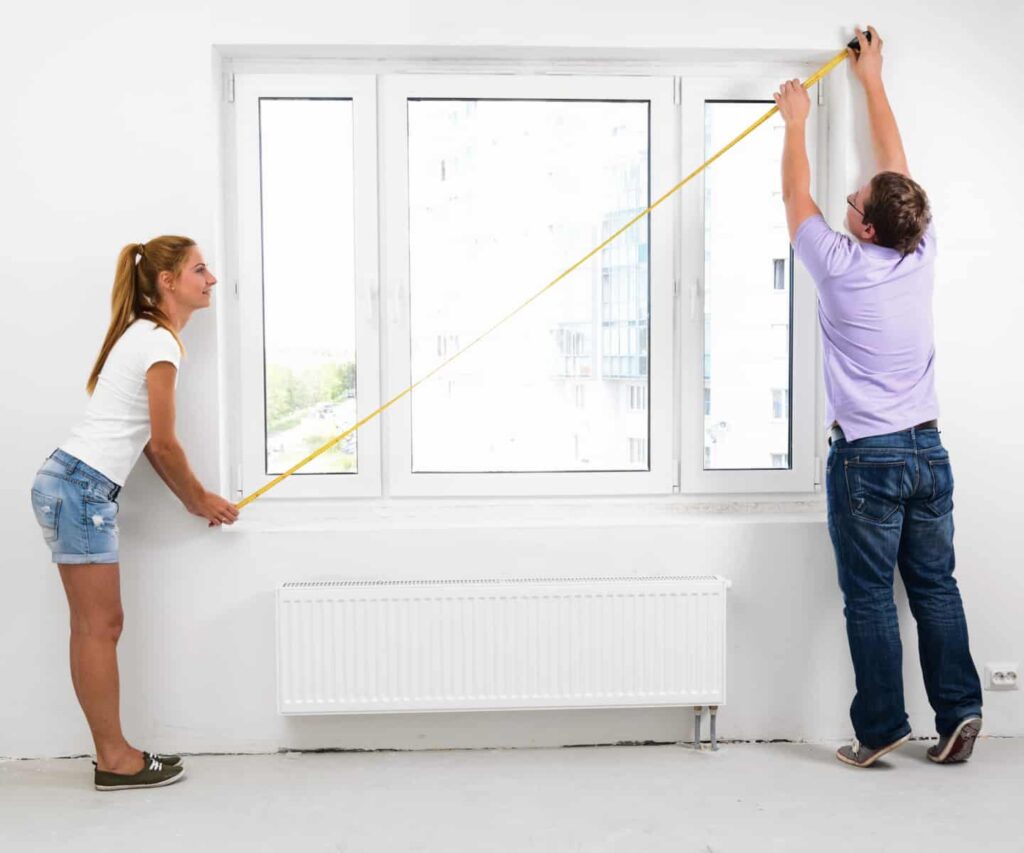
1. Measure window width
When it comes to the window replacement process, accurately measuring the width of each window is essential. Measurement mistakes can cause costly delays and potentially result in a poorly-fitting new window which ends up costing more money in repairs or replacement.
Taking accurate measurements also makes cost estimation easier, ensuring that you won’t pay for more frames than necessary. When measuring the width of either a single pane or multiple panes like with bay windows, use a tape measure from one side to the other for precise results.
Make sure your measurement includes any jamb extensions if applicable because these will add extra dimension in some cases: for example, an angled sill may need to be taken into account when computing total length.
In the case of bay windows it’s important to take proper measurements of each panel at their center point since they vary due to design differences such as headers, sills or jambs being higher on one side versus the other.
2. Measure window height
When measuring the height of a window for replacement, it is essential to do so accurately. Taking accurate measurements can ensure correct fitting when replacing your windows and help you get an accurate cost estimate.
The most precise way to measure a window’s vertical size is by taking three separate height measurements – left side, center, and right side – before selecting the smallest of these numbers as the official measurement.
Generally, rulers or tape measures are used for this purpose, and measurements should be recorded in inches or any other preferred unit of measurement. Additionally, bay and bow windows require trim-to-trim measurements at the center with a level or square check prior to installation.
3. Measure window depth
Measuring the depth of a window correctly is essential to ensuring you get a replacement window that fits properly and can be installed without causing any issues. To measure the correct depth, open the window completely and then measure from front to back of the sill space at least 3 1/4 inches deep.
It’s important to also ignore any parting strips or pulleys as these will not be used in your replacement installation process. Knowing how much opening depth you have helps determine both size and type of window needed for successful installation.
Homeowners, property managers, real estate investors, and commercial property owners should all ensure they take accurate measurements when replacing windows to avoid common pitfalls associated with improper installations or inadequate sizes for new windows.
Measuring for Different Types of Windows
It is essential to understand the crucial measurements and styles for each window type in order to accurately measure your windows for replacement, such as awning/casement windows, sliding/double-hung/single-hung windows, and bay/bow windows.
Awning/Casement windows
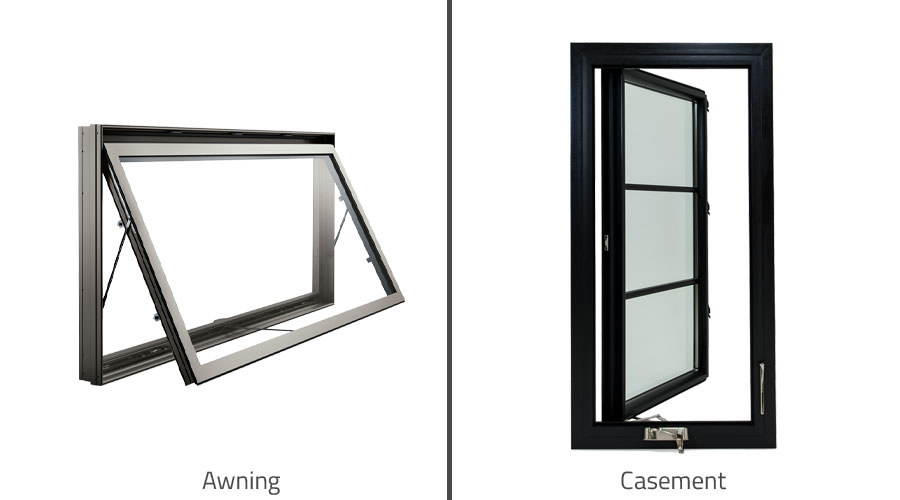
Awning/casement windows are a great way to let in natural light and ventilation into almost any space. When measuring these types of windows for replacement, it’s important to take the exact measurements in order to ensure that the new window fits correctly.
For accurate measurements, use carpenters’ levels with multiple bubble level indicators on both horizontal and vertical planes—these will be used to measure the different sides of the window (i.e., sill, jambs, and header).
Additionally, make sure you check if your old windows square or level before taking additional measures. To get started with measuring your awning/casement window for replacement, measure its width first by “mark-measure-transpose” technique using a carpenter’s tape measure or ruler from side jamb opening outwardly over exterior stops as required.
Then proceed to take note of its height from the top sill origination point until meeting other stop at base. Finally calculate its depth recorded at lower jamb behind trim from inside outwards toward exterior stonework back side details to achieve overall accuracy required whilst considering ventilator demands also should you desire any installed for added complexity consideration points purposes.
Bay/Bow windows
When measuring for replacement windows, whether they are casement, sliding, double-hung, or single-hung windows it is important to accurately measure each window opening. Ensuring the measurements are accurate helps with both proper fitting and cost estimation of a window’s replacement.
When taking your measurements make sure to include any trim that intersects with the frame such as sills and jambs to have exact specifications for a perfect fit. Additionally some windows such as bay/bow require precise measurements so be sure to properly check for squareness and level before beginning any installation projects.
Sliding type windows should be measured in width from trim to trim in order to determine height while double-hung window and single-hung window types can use standard measurement along all faces of the frames.
Bay/Bow windows
Bay and bow windows provide a great way to add depth and character to any room in your home. These unique designs have angled panes that form a gentle curve, or alternatively have rounded shapes that fit multiple replacement applications.
Unlike traditional rectangular-shaped windows, the measurement of bay and bow windows need some special attention due to their complex design which often requires measurements at different points around the window frame.
To ensure proper fitting of replacement windows, make sure you double-check each dimension including width, height, depth as well as angles with all the noted parts such as sill, jambs, and headers taken into account since they differ from conventional types of windows.
DIY vs. Professional Window Measuring
DIY window measuring offers the potential for cost savings, but it is important to consider any risks associated with attempting this project yourself. Ultimately, whether you measure your own windows or hire a professional depends on the complexity of the project and available resources.
DIY homeowners can certainly benefit from taking measurements themselves, though there are risks involved that could end up costing more in required repair work if not done correctly.
Also keep in mind additional factors such as specialized tools needed or accessibility issues regarding reaching high windows. If these considerations outweigh cost potential savings associated with trying to do it yourself then hiring a professional may be the best option.
Regardless of which route is chosen, taking proper measurements should always be done accurately to ensure promised accuracy for replacement windows fitment during installation.
FAQs
1. How do I measure a window for replacement?
To measure a window for replacement, first you need to determine the height and width of the opening, taking into account factors such as existing trim or molding. Then, use a tape measure on all sides to get the overall measurements of both the interior and exterior opening.
2. What tools are needed to measure a window for replacement?
The only essential tool that is needed to accurately measure a window for replacement is an accurate tape measure with centimeter-millimeter markings. Additionally, a level can be used if available.
3. Are there any safety concerns when measuring windows?
Yes, there may be safety risks involved when measuring windows that are located in high places or difficult-to-reach areas, so it’s important to take necessary precautions such as wearing protective clothing or using appropriate ladders/scaffolding while doing this activity.
4. How should I record my measurements once they’ve been taken?
It’s important to record your measurements accurately and clearly so that you have something concrete refer back to later if needed during installation or ordering new windows –
These records could include things like drawings showing size and placement measurements; written notes (including product names) or even photos highlighting exact locations within each room where new windows will go later on down the line!